How to add Swiftype to a WebStarts Website
WebStarts is an easy to use on-line tool for building a custom website. To install a speedy Swiftype search box to your site, follow these steps.
Quick Installation
The easiest way to install Swiftype is to create a new Search page that is in your main navigation and put Swiftype on that page.
Step 1: Create a Swiftype Account
You can create a Swiftype account for free, and you will use this account to control your search engine once it is installed.
Step 2: Create a Search Engine for your website
To create your search engine, from the main Swiftype dashboard click the Create Search Engine button in the upper right corner.

Next, click the Web Crawler button, and from here enter the URL of your WebStarts website. Once your site passes the validation check you'll be able to give your engine a name.
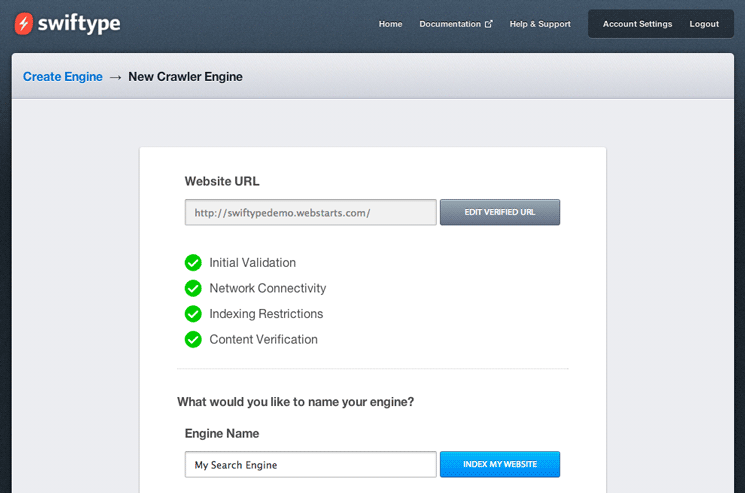
Our system will crawl your website and create the search engine in real-time, showing you our progress along the way.
Step 3: Add a new page to your WebStarts site
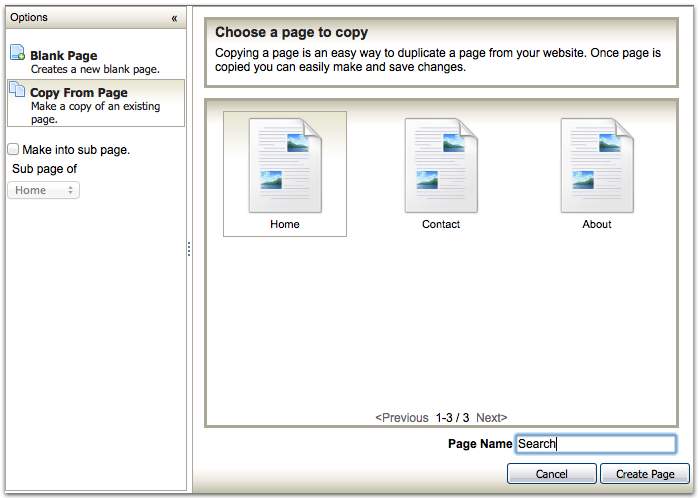
While Swiftype is indexing your website, go to your WebStarts site editor and create a new page ("Search" is a good name for this page). The page will be automatically added to your navigation menu so your visitors can find it everywhere on your site.
Step 4: Copy the Installation Code
Next, head back to your Swiftype dashboard and click the Install button.

Then copy and paste the code found under the first 'Overlay' option.
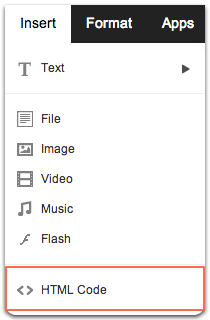
Step 5: Edit your "Search" page in WebStarts
Now it's time to insert an HTML object into your site. Within the WebStarts site editor, click on the "Insert" menu option. Then select "Insert HTML".
Now paste your Swiftype install code into the WebStarts HTML pop-up window.
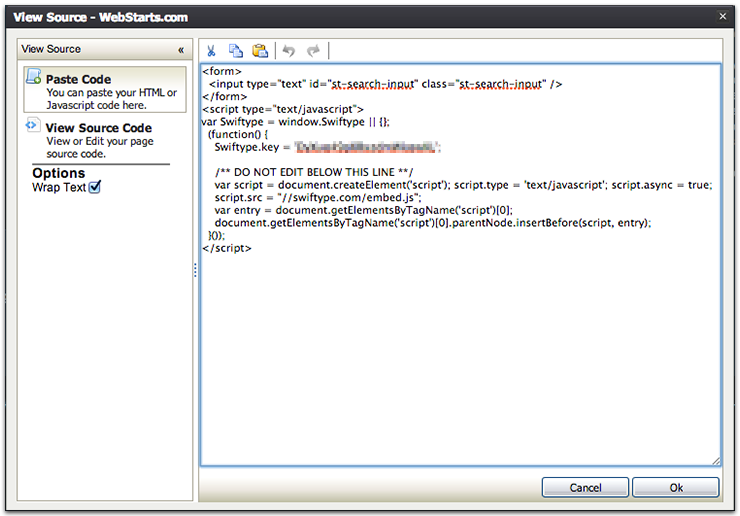
From here, click "Ok", move your HTML search object into position, click "Save and Publish", and you're done!
Your search engine won't work within the page editor mode, so you'll want to click the  button to see it in action. Also, make sure that you update the page settings of each page in your WebStarts site to add custom page titles.